Structural Elements

Here is a wish-list of all the structural changes to be made, when and if possible on the site–roughly in order of priority.

-Screen doors to be installed on the east and west doorways of the house and on the western door of the office to allow cooling breezes to passively move through these buildings in warm months.

-trellises buffering all western walls from the hot afternoon sun with deciduous vines planted in order to help keep buildings cool.

-Shutters added to the outsides of all windows in order to keep heat out of buildings when appropriate

-A composting toilet to replace the water-wasting conventional flush toilet.

-All greywater diverted into the zone 1 landscape for below-ground irrigation.

-Create a moveable chicken house and run.

-Build a portable, raised rabbit hutch.

-A pigeon loft will be erected.

-Since all rooftops are going to capture rainwater for drinking, roofs may need to be changed for water safety.

-Three large water tanks installed around the property.

-Build a cold-frame along south side of the house.

-Solar PV arrays on rooftops.

-Install a long, black, solar chimney through the roof on south side of the house to suck hot air out of the house while drawing cool air in from the other side during the summer season.


The Design Site

Pre-swales site

Here is a rundown of the site’s basic information as it stands now:

 Size: 1.25 Acres

Latitude/Longitude: 34.1269° N, 116.3186° W

Altitude: 2,700 ft. (822.9 meters) above sea level

Slope/Aspect: Very Gentle Slope, S, SE,  (and small area of SW)

Continental Effect: 115 miles from the west coast of California

Climate: Arid desert

Plant Hardiness Zone: 9a

Koppen Classification: BWh

Soil: Coarse decomposed granite sand with very little organic matter and very little clay.

pH: 6 (I feel mistrusting of this reading and am planning to get a better pH test kit to be sure).

Avg. days above 90F(32c): 150

Avg. days Below 32F(0c): 28

First/ Last Frost: 11/3, 4/4

Wind: Hard winds from S, and SW in spring and fall. Cold winds from N in winter. Light breezes from E and SE in summer

Rainfall: Very rare! 4.6 inches (116.8 mm) per year average. The wettest months of the year are in mid-winter and mid-summer (monsoon thunderstorms).

Structures: There are three existing structures:

-House ( 858 square foot wood/drywall)

-Office (120 square foot, wood/drywall)

-Shed/Carport (wood, at west end of property)

Significant Trees and Shrubs: 1 mature Honey Mesquite, 2 mature Palos Verdes, 1 mature fruitless mulberry shade tree, 1 40 year old female pistachio tree, 2 young male Pistachios, 1 young female Pistachio tree, 2 young apricot trees, 1 Asian pear tree, 3 Jujube trees, 1 young (possibly fruitless?) olive tree and several Pomegranite shrubs.

Natives: 3 mature Joshua Trees, 5 large mature Yucca Plants, numerous Creosote Bushes, Mormon Tea shrubs, White Bur-sage, Button Brittle Bush, Beavertail Cacti, Pencil Cacti and Silver Cholla plants.

The Experiment

My family and I are beginning an experiment on our little piece of Mojave Desert land to see if it is possible, through permaculture, to create a hardy and resilient living system around us, which can begin to provide for our needs more and more, and radicallly reduce our need for inputs from outside our local Joshua Tree area. Beyond this, we hope to see if it is possible to eventually begin to yield enough of a surplus of food, products and information from the system to begin to be able to contribute to the growth of a truly local food culture and economy here. The daunting, yet exciting challenge is to move toward these aims in ways that work within natural limits of this extremely arid ecosystem, always with an eye towards the welfare of future generations of life on this planet, and in keeping with the ethics of permaculture. Our intention is to chronicle the adventure here, for the benefit of the global permaculture community, and specifically those working in arid desert climates.

(Illustration revised January 2015)

(Illustration revised January 2015)

motherhood, still kicking my ass

last night involved multiple bed-sheet and pajama changes, vomit, the thermometer, and baby tylenol. i was awoken from deep sleep to the sound of puking. i took it in stride, i did what had to be done without freaking out. 103.7 is high enough of a fever that i don’t hem and haw about giving him something to lower it. i rested in between clean-up episodes. this morning i was feeling pretty good about myself. i thought, well, it took more than two years, but i think i’ve got my mothering legs under me. i can totally do this motherhood thing! this feeling continued throughout the day as i ignored everything except my droopy little munchkin, including feeding and hydrating myself. then 5:00 hit and he started to feel better. just enough better to start demanding impossible things. he had just enough energy to become intent on picking at the mole on the side of my boob, just enough energy to throw a fit when i wouldn’t let him. at that moment all those feelings of peace and confidence and gratitude drained out of me and i was all victim and martyr. i looked around to see if perhaps there was a prince in shining armor who might take me to the spa for a few days. i saw nobody.  the only thing to do was reach deeper inside myself and try to rise out of the urge to pinch that little twerp back. i swallowed my pride,  put on some kipper and pulled myself together. then we went outside and wouldn’t you know it, my prince in shining armor strode up and asked, “would you like me to take over for a shift so you can take care of yourself?” 

will there be a day when i can take care to meet my own needs before i break down and need to be rescued? i do hope so. in the mean time, motherhood, you are kicking my ass. i kinda thought that thing of parenting being humbling and kids teaching us so much was a cliche. turns out it’s not. i suppose i should be grateful for the fast-track road to self awareness. oh look, here’s all the ways i’m petty and immature! good to know, good to know.

eating mesquite

Image

the biggest tree on our property is a wild honey mesquite. it’s loaded with pods right now.

Image

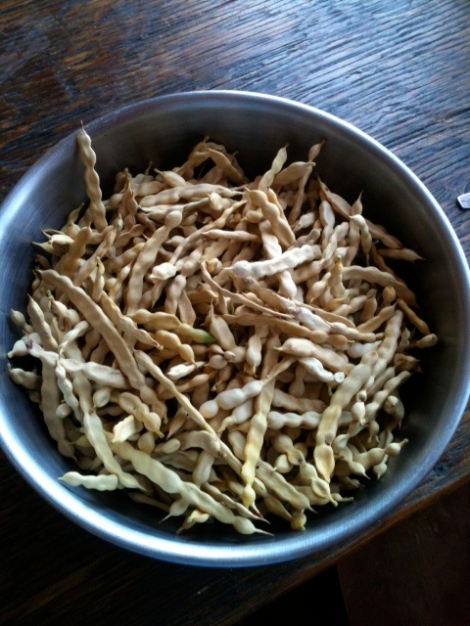
damian picked a bowl full and put it in the vitamix. then he sifted it (the empty hulls on the left make a good mulch or carbon addition to compost)

Image

and then i was ready to bake!

after getting really excited about eating mesquite (blood-sugar balancing, high protein super food), i was disappointed when i started looking for recipes and couldn’t find any that used exclusively mesquite. the flour is delicious on it’s own, but it does have a rather strong flavor. so if you want baked goods like you grew up with, you’re gonna want to mix it. sometimes i do want baked goods like what i am used to, but i also like to let foods be what they are and not try to turn them into something they are not. i do not like foods that need quotation marks. soy “cheese,” almond crust “pizza,” chicory “coffee,” raw cauliflower “mashed potatoes.” no thank you. i like my cauliflower as cauliflower, pizza as pizza. but when it comes to mesquite, how can i let it shine as itself? what is it?

i’m gonna find out. we tried pancakes with 100% mesquite. they were fine, tasty, even, with yogurt and blueberries, but it took a lot of eggs to get them to hold together, and i got the feeling something like a scone or biscuit would be more suited to it’s properties. the cinnamon and caramel notes remind me of graham crackers, so i started there.

they turned out delicious! the mesquite flavor shines. when i make these again though, i’m going to do the same recipe but make them thick like scones. yours will not be this messy unless you also have a two-year-old “helper” -see, quotation marks are not a selling point! also you will use two trays instead of one…Image


(that dark spot is on my camera lens, not the biscuit)

i know i just said i wanted to use 100% mesquite, but i also wanted something really yummy, and i’m just learning, so i used half mesquite here. i’ll post more recipes as i discover what works.

Mesquite biscuits

adapted from smitten kitchen’s graham cracker recipe

1 1/2 cups unbleached all-purpose flour

1 cup mesquite flour

3/4 cup  brown sugar, lightly packed (i used turbinado, because that’s what i had)

1 teaspoon baking soda

3/4 teaspoon salt

1 stick butter, cut into 1-inch cubes and frozen

5 tablespoons milk, full-fat is best

2 tablespoons vanilla extract

Topping (optional) i didn’t do it because i wanted to feel good about eating them for breakfast)
3 tablespoons granulated sugar
1 teaspoon ground cinnamon

Combine the flours, brown sugar, baking soda, and salt in the bowl of a food processor fitted with the steel blade or in the bowl of an electric mixer fitted with the paddle attachment. Pulse or mix on low to incorporate. Add the butter and pulse on and off on and off, or mix on low, until the mixture is the consistency of a coarse meal.

[Alternately, if you don’t have a food processor or electric mixer, you can cut the ingredients together with a pastry blender. Just make sure they’re very well incorporated.]

combine milk, and vanilla extract. Add to the flour mixture and pulse on and off a few times or mix on low until the dough barely comes together. It will be soft and sticky. cover and chill it until firm, about 2 hours or overnight. Meanwhile, prepare the topping, if using, by combining the sugar and cinnamon in a small bowl and setting aside.

flour your work surface and roll the dough into a rectangle about 1/4 inch thick. The dough will be sticky, so flour as necessary. Trim the edges of the rectangle and cut it into squares (or use a cookie cutter for fun shapes.) (or make scones!)

Place the biscuits on one or two parchment-lined baking sheets and sprinkle with the topping. Chill until firm, about 30 to 45 minutes in the fridge or 15 to 20 minutes in the freezer. Gather any scraps together into a ball, chill until firm, and re-roll.

Adjust the oven rack to the upper and lower positions and preheat the oven to 350°F.

Bake for 15 to 25 minutes, until browned and slightly firm to the touch, 

a helpful guide to joshua tree summers

my brother-in-law wrote a post about coping with heat in this place last year. his description of what the temperature ranges feel like inspired me to write this little post. if i was better with graphics, i’d make a cute thermometer noting what to expect right on there to entertain you, but for now you’ll just have to imagine it.

daytime high temps:

70-79F (21-26C)… aka winter – sunbathe, garden, hike, call canadian relatives to gloat

80-89F (26-31C) you get too hot in the direct sun, so do your yard work before 10am or after 5pm. do inside stuff midday or take a nice siesta in the hammock. call vancouver relatives to gloat.

90-99F (31-37C) keep the swamp cooler turned on, and keep watermelon and whiskey sours available. do all your cooking in the solar oven or grill (do not turn on oven). siesta is a must so you can get up early to do your work. if you want to be outside in the middle of the day, soak a long sleeve shirt and wear it until it dries, the soak it again. spend evenings outdoors playing catch with the toddler and marveling at the sunset in the comfortably warm breeze.

100-105F (38-40C) opening the door is like walking in to a sauna, so don’t do it. make sure you have some kind of pool you can submerge yourself and your child in several times in the day (in the shade!). observe that the lizards and road runners are visibly panting. count the hours until sunset. when the sun finally goes down, go out to water the trees.

105-110F (41-43C) eyeball-scorching wall of heat. feel how hot the windows are. do not go outside except to scuttle over to the in-law’s air-conditioned living room. leave the swamp cooler on 24 hours a day. do not call canadian relatives but do secretly watch youtube videos of the aquabus and have heat induced, mirage-like visions of laying in a cool dark cave with moss and the sound of a creek.

111-115F (44-46C) (today). brain is cooked. ask yourself why you live here. plan escape to the beach or north. tell yourself, “this too shall pass.” let the kid watch tv. eat watermelon, cucumbers, and lemonade. do not cook. do not clean. do not do work of any kind. do NOT call canadian relatives.

in praise of kefir and my holy grail of pancakes

i’ve been on the fermentation bandwagon for a few years now (yay gut flora!). i have a hard time keeping up with all my projects, but i do enjoy feeding my family homemade kimchi, sauerkraut, kombucha, sourdough bread, and kefir. the fact is that we are pretty much addicted to all of the above, so when i don’t make it at home (or when a batch doesn’t turn out) we spend a fortune on store-bought.

i was slow to add kefir to my home fermenting after a bad experience i had witnessing a housemate’s goat milk kefir become infested with fly larva. i best not say anything more about that… but really, kefir is probably the easiest home ferment around. just get yourself some kefir grains (ask your friends or look at craigslist. i bought mine through amazon), add milk, cover and let sit until it thickens (12-24 hours), strain and enjoy. repeat. no heating, chopping, pounding or salting is required.

we drink it by the glass, add it to smoothies, put it on granola, and bake with it. which leads me to the point of this post; my holy grail of pancakes. the pancake i have been trying to make for years is an eggy, soft, tender, slightly sweet one. it’s the one they bring you when you go to de dutch pannekoek house, only arguably, this one tastes even better and is free from gmo’s etc. i’ve tried a lot of recipes, but never got the texture quite right. until i started basing the batter on kefir. i’m quite proud of myself for inventing this.

Dutch style kefir pancakes

  • 2 cups kefir (buttermilk would probably work fine too)
  • 4 eggs
  • 2 tablespoons sugar (or something like sugar)
  • 3/4 tsp baking powder
  • 1 cup unbleached flour
  • butter for the pan

whisk your eggs into the kefir, then add the dry ingredients and mix until just combined. heat a tablespoon of butter in the pan, then turn the heat quite low and cook your pancakes. try not to rush them, they are best cooked with the pan not too hot.

you’re welcome.

Allergy Healing Diet

damian suffers from pretty intense pollen allergies. they were the worst when we lived in oregon in the “grass seed capital of the world” (there’s really a sign that says that), but they’ve got worse and worse every year here in joshua tree. the allergy “season” lasted all year for damian 2 years ago as he got one sinus infection after another. the allergy meds barely even made a dent. last spring, after watching damian suffer all year, we decided to take some kind of action to change the situation. i sifted through internet claims of miracle cures and expensive treatments, and read a few books about allergies. we decided to try the program outlined in the book “allergies, disease in disguise” for a few reasons;

  1. the book did not make me want to throw the kindle at the wall by making grand, un-sourced declarations such as all allergies are caused by chem trails or repressed emotions or whatever.
  2. the program lasts 4-6 weeks. after that (she claims) you are all fixed and you can go back to your normal lifestyle without symptoms. obviously, this is a lot more appealing than being on a rotating elimination diet for the rest of your life.
  3. the supplements and lifestyle recommendations are affordable and not overwhelming. i spent about $40 on supplements and an extra $100 on groceries for the month.
  4. the program is complementary to gut-flora regeneration programs such as GAPS, which i’ve watched heal my friends, but are too extreme for me.

the program is meant to treat candida overgrowth, parasites, and inflammation while replenishing gut flora, improving digestion with enzymes, and nourishing the body. i won’t get in to the specifics of why and how the author thinks these conditions contribute to allergies (i’m not even sure i agree). but we decided to just do the program as prescribed to give it a chance. the results? it really seemed to work. we are both hesitant to declare that something is a cure, but damian’s symptoms improved within a week on the program and he was symptom free for nearly a year.  he started feeling allergic again this month when the pollen count hit double digits, so we are back on the program and again, he’s feeling good despite the pollen count remaining high.

what it looks like for us:

  1. supplements: a nasty-tasting anti-fungal blend with garlic and some other stuff (for candida), a wormwood-clove tincture (for alleged parasites), digestive enzymes, and probiotics.
  2. elimination of potential food triggers (and foods that feed candida) -no milk, cheese, wheat, yeast, sugar, processed crap…
  3. addition of nutrient dense foods: bone broth and mountains of greens with every meal, fresh vegetable juice, grass fed beef, beets, sprouted rye “bread,” salmon…
  4. fermented foods: homemade kimchi, kefir, sauerkraut, kombucha… the book doesn’t emphasize the nutrient dense stuff and the ferments, but i’ve been brainwashed by my friends to think this is really important for gut health, which is really important for everything, so i’m going for it.

that’s about it. it’s more work, and i have a hard time staying ahead of the game with broth and juice so we aren’t consuming as much as i would like, but i enjoy making sweet potato latkes for breakfast and find drinking a hot cup of miso bone broth almost as enjoyable in the morning as my usual coffee & cream. it’s also nice to know we’ll be done in two weeks, and be healthier for it.


encouraging garden update

last time i wrote about the garden, you may have detected some discouragement. but, friends, spring is here and the garden is booming! for at least a month we’ve been eating huge bunches of greens (kale, boc choi, collards, chard, broccoli) every day. and as of about a week ago, when we started an allergy healing diet, we’ve been eating huge bunches of greens three times a day! i was trying to calculate how much i would be spending for our current consumption at the farmers market, i figure at least $40 a week for 21 bunches of greens. this year i timed it just right so as we are harvesting the last of the fall greens, my fresh tender spring greens are ready to harvest too. plus radishes, peas and favas are all starting to get big enough to eat. as of today, none of my plants have aphids or other bugs. i’m not sure why, but i’m not complaining.

at the same time that we’ve increased vegetable production (and consumption), we’ve lowered our water bill to an impressively low amount. last time i wrote about the garden, i was too embarrassed to tell you what our water use was, but now that i have proud new numbers, i’ll fess up. first some context: the average US water use per person per day is 300 gallons. california and texas are the biggest hogs, here use is more like 500 gallons pppd. in new york city, (more density, less landscaping) the average is 65 (go new york!). zooming in to california, the more dense areas by the coast average 136, but in palm springs, where they’ve turned the desert into golf courses, average usage is a whopping 736 gallons! but friends, i have a confession to make; last fall we conservationist environmentalist desert lovers used 420 gallons per person per day. i’m sorry. now for the good news; we got our usage down to 50 gal per person per day. even though i do a load of laundry almost everyday in an inefficient washer that uses 40 gal per load. i didn’t count oliver (our almost 2-year-old) in my calculations, if i include him, which i guess i should since he has a daily bath and otherwise uses water, then we’d have usage of 33 gal per person per day with an orchard, big garden, and chickens. woohoo!

how did we get our usage down, you ask? 4 things: smarter gray water use, less toilet flushing, smarter bathing, and smarter garden watering.

our gray water is now the only way we water our trees and landscaping.

we don’t flush the toilet unless there is poop in it.

we most often bathe by filling a 3 gallon square container (like a rubbermaid) with warm water and a squirt of dr bronners. for adults, put the container in the bath tub and use a nice sea sponge to wash yourself from top to bottom. you’ll never go back to showers. for a toddler, just stick ’em in the tub. they have a nice deep bath, and they don’t slip or drown because they have nice back support.

we mulched the garden heavily and bought a hydrometer – a nifty little tool you can get for cheap that tells you how moist the soil is. by only turning on the system when the garden is dry, we were able to scale way way back on the water. mulching helps too.

we’ve been planting and planting for spring and summer. hopefully our garden success will continue through the season!

biocompatible vs. biodegradable – a lesson in grey water use

oasissince we moved into this house, we’ve used our grey water from the kitchen sink to water trees. it’s a very low-tech bucket system. we also recently “upgraded” our washing machine drain so it goes into a barrel with a spigot connected to a hose that we move around to the trees in the orchard.

we felt great about all this until the trees that got the majority of our dish water started dying. oops. turns out most detergents, even those labeled “biodegradable,” contain salts that are very harmful to plants when they build up in the soil. where we used to live, in eugene, we probably could have got away with using regular soap because there’s enough rainfall to flush a lot of the salts away. but here in joshua tree, that’s not the case (last year we got 2 inches of rain, that’s what vancouver got in the last 3 days!). the salts just build up until the soil is totally toxic to plants.

it’s pretty hard to reverse the damage done by salts once it’s done, but we can stop adding salts by using grey water safe, or better yet, biocompatible detergent. i was already buying biodegradable soap, thinking it was grey water safe, but those labels are misleading. biodegradable means something will break down, but what it breaks down into may or may not be toxic to plants. biocompatible means that it breaks down into plant nutrients (no salts!), and makes plants happy. yay! i just ordered oasis bicompatible laundry detergent and dish detergent. so far they seem to work fine. i’ll post a review once i’ve used them for a while. even if they don’t work quite as well as regular detergent, i’m willing to sacrifice a bit of performance for being able to recycle what amounts to about 55 gallons of water a day (that’s 45 for laundry and 10 for the kitchen sink).